
Pada postingan kali ini saya akan menerangkan step by step cara instalasi MikroTik dengan GNS3
(In this post I will explain step by step how to install MikroTik with GNS3)

(The materials must be prepared)
1. ISO MikroTik ← jika tidak punya bisa download disini
( 1. ISO MikroTik if you do not have to download
2. GNS3)
Langsung kita masuk ke tkp, berikut langkah-langkah instalasi MikroTik :
(Follow the installation steps as follows Mikrotik)
1. Copy file ISO MikroTik ke dalam Folder GNS3 yang terletak di folder Program Files
(Copy the ISO file into a folder MikroTik GNS3 which is located in the Program Files folder)

Copy ISO Mikrotik

Masuk ke dalam folder GNS3, lalu paste kan didalamnya
(Entry into GNS3 folder, and then paste it in it)
(Entry into GNS3 folder, and then paste it in it)

File ISO Mikrotik sudah berada di dalam folder GNS3
(Mikrotik ISO files already in the folder GNS3)
2. Cari Command Prompt (cmd) → klik kanan → pilih "run as administrator"
(Search Command Prompt (cmd) → right click → select "Run as administrator")

3. Masuk ke directory atau folder GNS3 dengan cara seperti perintah pada gambar berikut
(Go to the directory or folder GNS3 the way commands in the picture below)
(Go to the directory or folder GNS3 the way commands in the picture below)

Masuk ke Local Disk C
(G to Local Disk C)

Masuk ke dalam directory GNS3
(Entry into the directory GNS3)
4. Buat file mikrotik.img dengan cara mengetikkan perintah seperti gambar dibawah ini
(Create mikrotik.img file by typing the command as shown below)
(Create mikrotik.img file by typing the command as shown below)

5. Jika perintah diatas berhasil, maka akan menghasilkan seperti gambar dibawah ini
(If the above command is successful, it will produce as shown below)
(If the above command is successful, it will produce as shown below)

6. Ketikkan qemu.exe mikrotik.img -boot -cdrom "nama iso mikrotik nya" seperti gambar dibawah ini
(Type qemu.exe mikrotik.img Boot -cdrom "proxy iso his name" as shown below)
(Type qemu.exe mikrotik.img Boot -cdrom "proxy iso his name" as shown below)

7. Tunggu untuk memulai tahap instalasi
(Wait to start the installation phase)
(Wait to start the installation phase)

8. Pada menu instalasi ditampilkan service apa saja yang ingin kita install, Tekan ‘a’ untuk memilih semua opsi, tekan ‘spacebar’ untuk memilih salah satu opsi, tekan ‘i’ untuk menginstal, dan tekan ‘q’ untuk keluar. Disini saya menekan ‘a’ untuk memilih semua opsi kemudian ‘i’ untuk memulai instalasi
(On the installation menu shown what services we want to install, press 'a' to select all the options, press 'spacebar' to select an option, press 'i' to install, and press 'q' to exit. Here I press 'a' to select all of the options and then 'i' to start the installation)
(On the installation menu shown what services we want to install, press 'a' to select all the options, press 'spacebar' to select an option, press 'i' to install, and press 'q' to exit. Here I press 'a' to select all of the options and then 'i' to start the installation)

↓

(Press "a" and then press "i"))
9. Jika muncul seperti ini, tekan saja tombul "y" untuk melanjutkan
(If it appears like this, just hit Tombul "y" to continue)
(If it appears like this, just hit Tombul "y" to continue)

10. Proses instalasi selesai, lalu tekan ENTER
(The installation process is complete, and then press ENTER)
(The installation process is complete, and then press ENTER)

11. Jika ada seperti ini lagi, langsung ditutup saja, karena jika dibiarkan kita akan melakukan instalasi ulang dan kembali ke tahap no.8
(If there is like this again, immediately closed it, because if left we will have to reinstall and go back to step no.8)
(If there is like this again, immediately closed it, because if left we will have to reinstall and go back to step no.8)

12. Selanjutnya masuk ke GNS3
(Next go to GNS3)
(Next go to GNS3)

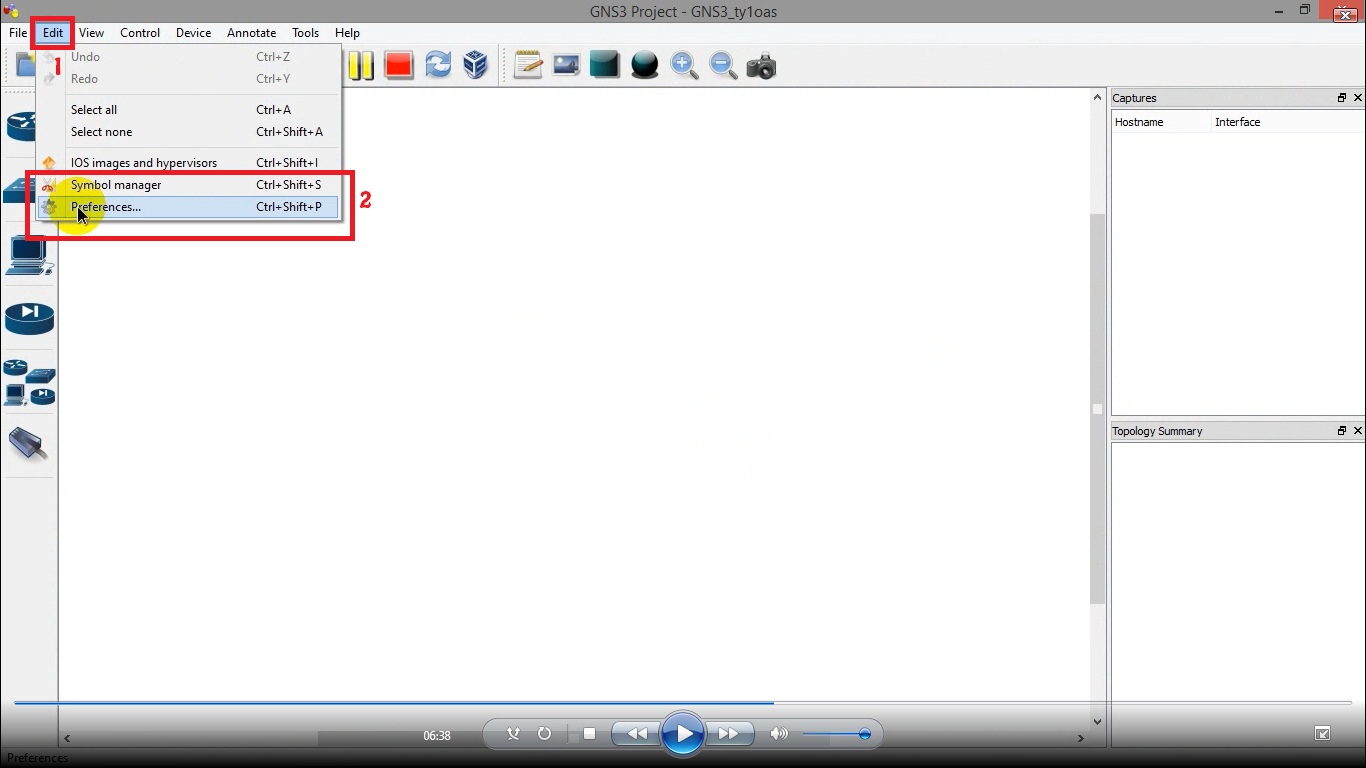
13. Pilih Edit → Preference
(Choose Edit → Preference)
(Choose Edit → Preference)
15. Lakukan Test Setting hingga muncul tulisan berwarna hijau seperti gambar dibawah ini
(Perform Test Setting up posts appear green as shown below)
(Perform Test Setting up posts appear green as shown below)

16. Pergi ke tab "Qemu Guest" lalu isi :
1) Isikan nama yang anda inginkan
2) Cari letak File mikrotik.img yang tadi sudah dibuat
3) Klik Save
4) Jika berhasil akan muncul seperti lingkaran yang saya kasih nomor 4
(Go to the tab "Qemu Guest" and fill:
1) Fill in the name you want
2) Find the location of the file that had been created mikrotik.img
3) Click Save
4) If successful will appear as a circle that I love number 4)

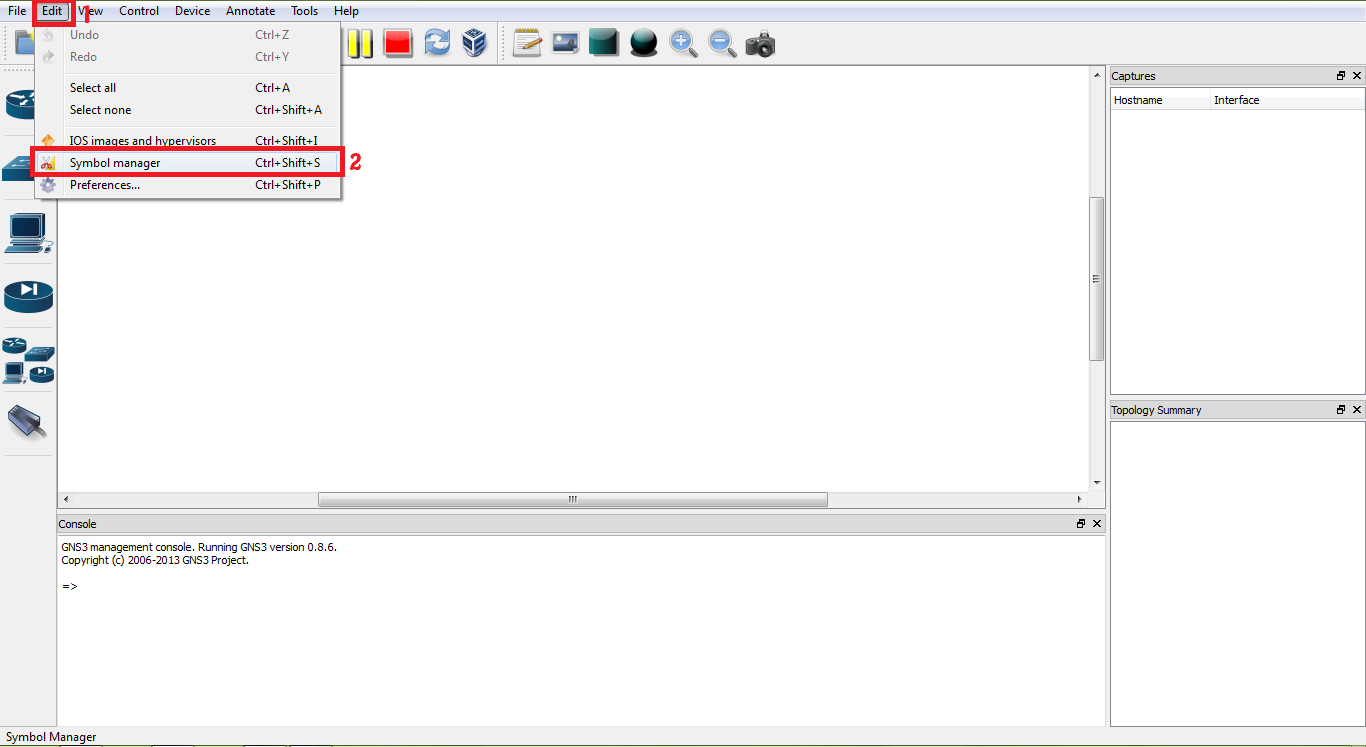
17. Pilih Edit → Symbol manager
(Choose Edit → Symbol manager )
(Choose Edit → Symbol manager )
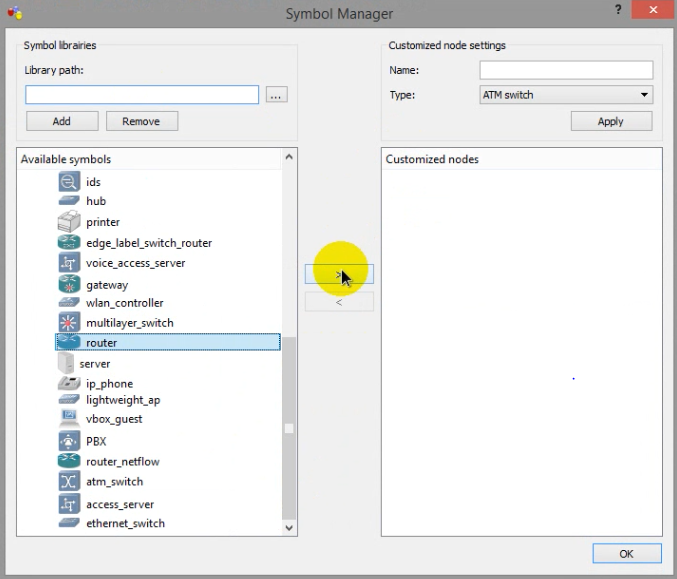
18. Cari symbol perangkat/node router
(Find Symbol device / node router)
(Find Symbol device / node router)

19. Klik tanda panah ke kanan
(Click the arrow to the right)
(Click the arrow to the right)
↓

20. Ketikkan nama yang anda inginkan untuk perangkatnya/node
(Type the name you want for the device / node)
(Type the name you want for the device / node)

21. Pada pemilihan type, anda pilih yang "Qemu guest"
(In the selection of the type, you select the "QEMU guest")
(In the selection of the type, you select the "QEMU guest")

22. Pilih Apply
(Choose Apply)
(Choose Apply)

23. Jika sudah di Apply nama "router" akan berubah menjadi "nama yang anda ketikkan pada langkah no.21". Selanjutnya pilih OK
(If it had been in Apply the name "router" will change to "name you type in step 21". Then select OK)
(If it had been in Apply the name "router" will change to "name you type in step 21". Then select OK)

24. Ikuti seperti gambar dibawah ini, maksut garis panjang dari no.2 ke no.3 yaitu, drag gambar pada perangkat/node ke layar kosong GNS3
(Follow as shown below, maksut long line of No. 2 to No. 3 ie, drag the image to the device / node to a blank screen GNS3)
(Follow as shown below, maksut long line of No. 2 to No. 3 ie, drag the image to the device / node to a blank screen GNS3)

25. Jika sudah, klik simbol play/start seperti gambar berikut
(If so, click the play symbol / start as shown below)
(If so, click the play symbol / start as shown below)

26. Tunggu hingga MikroTik akan melakukan login
(Wait until MikroTik will perform login)

27. Secara default, isikan :
- Mikrotik Login : admin
- Password : (dikosongkan)
Lalu ENTER
(By default, fill:
- Mikrotik Login: admin
- Password: (blank)
then ENTER)
(By default, fill:
- Mikrotik Login: admin
- Password: (blank)
then ENTER)

28. Tekan ENTER
(Press ENTER)
(Press ENTER)

29. Jika sudah seperti gambar dibawah ini, berarti MikroTik sudah siap untuk digunakan
(If it is like the picture below, means MikroTik is ready for use)
(If it is like the picture below, means MikroTik is ready for use)

JIKA ANDA BELUM MENGERTI BISA LIHAT VIDEO BERIKUT
SELAMAT MENCOBA
SEMOGA BERMANFAAT
WASSALAMU'ALAIKUM WR.WB


0 comments:
Post a Comment